Thanksgiving is just around the corner, and this year, I’m excited to introduce a twist to the traditional turkey routine—spatchcock style! Imagine this:
a turkey that’s not only juicy but has that golden, crispy skin that crackles under your fork. It’s like hearing your favorite song on vinyl—just a perfect mix of nostalgia and newness.
Plus, with the autumn leaves crunching underfoot and the scent of cinnamon in the air, this recipe feels like the warmest hug you could serve at the dinner table.
Steps
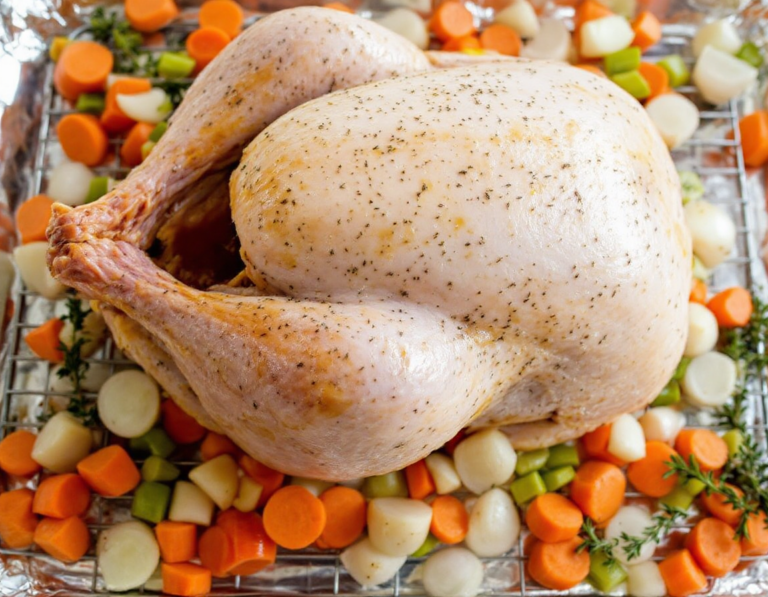
- Preheat your oven to 450°F (230°C) and prepare a baking sheet by lining it with foil. Lay out two-thirds of the chopped onions, carrots, celery, and thyme sprigs on the bottom, then set a wire rack on top.
- Pat the turkey dry with paper towels, rub it with 1 tablespoon of vegetable oil, and season with salt and pepper. Tuck the wing tips behind the turkey, and place it breast-side up on the rack, pressing down slightly to flatten it.
- Roast the turkey in the oven, occasionally rotating it, for about 80 minutes until an instant-read thermometer reads 150°F (66°C) in the breast and at least 165°F (74°C) in the thighs.
- While the turkey is roasting, prepare the gravy by chopping the neck, backbone, and giblets. Heat 1 tablespoon of oil in a saucepan, add the chopped turkey parts, and cook until browned.
- Add the remaining onions, carrots, celery, chicken or turkey stock, thyme, and bay leaves to the saucepan. Bring to a boil, then simmer for 45 minutes. Strain the broth and skim off the fat.
- Melt butter in a saucepan and stir in flour to form a roux, cooking it until golden brown. Gradually whisk in the strained broth, bring it to a boil, and simmer until it reduces to about 1 quart. Season with salt and pepper.
- Once the turkey is done, let it rest for 20 minutes before carving. Pour any accumulated juices from the roasting pan into the gravy, skim off fat, and combine.
- Carve the turkey and serve it with the prepared gravy.
Ingredients
- 3 large onions, roughly chopped (around 1.5 quarts)
- 3 large carrots, peeled and roughly chopped (about 1 quart)
- 4 stalks of celery, roughly chopped (approximately 1 quart)
- 12 sprigs of thyme
- 1 whole turkey (weighing 12 to 14 pounds), prepared as a butterfly with backbone, neck, and giblets set aside
- 2 tablespoons of vegetable oil, divided
- Kosher salt and freshly ground black pepper, to taste
- 1.5 quarts of low-sodium chicken or turkey broth, homemade or store-bought
- 2 bay leaves
- 3 tablespoons of unsalted butter
- 4 tablespoons of all-purpose flour
FAQ
- What is spatchcocking, and why is it beneficial for cooking turkey?
- Spatchcocking involves removing the backbone of the turkey and flattening it out, which promotes even cooking. This method allows the dark and white meat to reach their optimal temperatures simultaneously, resulting in juicier meat and crispier skin. Additionally, it speeds up the cooking process significantly.
- Can I still make gravy when spatchcocking a turkey?
- Yes, you can make a flavorful gravy using the removed backbone, neck, and giblets. These parts add a rich depth of flavor to your gravy, enhancing the overall taste of your meal.
- Are there any drawbacks to spatchcocking a turkey?
- One potential drawback is the appearance; a spatchcocked turkey may not be as visually traditional as a whole roasted bird. Additionally, you cannot stuff a spatchcocked turkey. However, placing the bird over a tray of stuffing during the first part of roasting can impart turkey flavor to the stuffing.
- What precautions should I take to prevent drippings from burning?
- To prevent the pan drippings from burning, you can place a layer of chopped vegetables like onions, carrots, and celery under the turkey. These vegetables release steam that regulates the temperature and prevents scorching, while also adding flavor to the drippings.
Tips
- Spatchcock for Even Cooking: Flattening the turkey by removing the backbone ensures that the dark meat cooks as quickly as the light meat, preventing the breast from drying out while the legs finish cooking.
- Crispier Skin: By laying the turkey flat, all the skin is exposed to the oven’s heat, resulting in a uniformly crisp and golden skin, as there is no skin hidden underneath.
- Flavorful Gravy: Use the removed backbone and giblets to enhance the flavor of your gravy, offering a richer taste compared to using just the drippings.
- Prevent Drippings from Scorching: Place a layer of chopped vegetables like onions, carrots, and celery under the turkey. This not only adds flavor but also prevents the drippings from burning, allowing them to be used in your gravy.
Equipment
- Skinned Spatchcocked (Butterflied) Roast Turkey with Gravy that you might not normally have at home and may need to purchase:
- Poultry Shears – Essential for cutting out the backbone of the turkey.
- Instant-Read Thermometer – For checking the internal temperature of the turkey to ensure it is cooked properly.
- Fine-Mesh Strainer – Used to strain the broth for the gravy.
- Wire Rack – Needed to place the turkey on top of the vegetables for roasting.
- 2-Quart Liquid Measuring Cup – For measuring and holding the strained broth.
- 2-Quart Saucepan – For making the gravy.
- Whisk – For incorporating the broth into the roux to make the gravy.